
Thanks to David Deines - updated 4/2/02
Here you go,
I can and will take pictures of the removed parts if you like.
Details, not much more than what I posted. I was rather disgusted with the breakage of the support right in front of the center console opening.
Am I the first one to do this? That seems incredible to me if true.
There are plenty of places for discreet switches inside here, the challenge is to do what I did without breaking stuff. Glenn told me to lever the beak points (beside the shifter) out with a screwdriver and then pull straight up on the console.
The parts have been cleaned and are on my counter awaiting a dose of epoxy.
All this, and my wife bought a Mitsubishi today. So
much for a peaceful day off.
David
From: David Deines
To: V8 SHO sub list
Sent: Tuesday, April 25, 2000 11:28 PM
Subject: Center console removal
Hey gang,
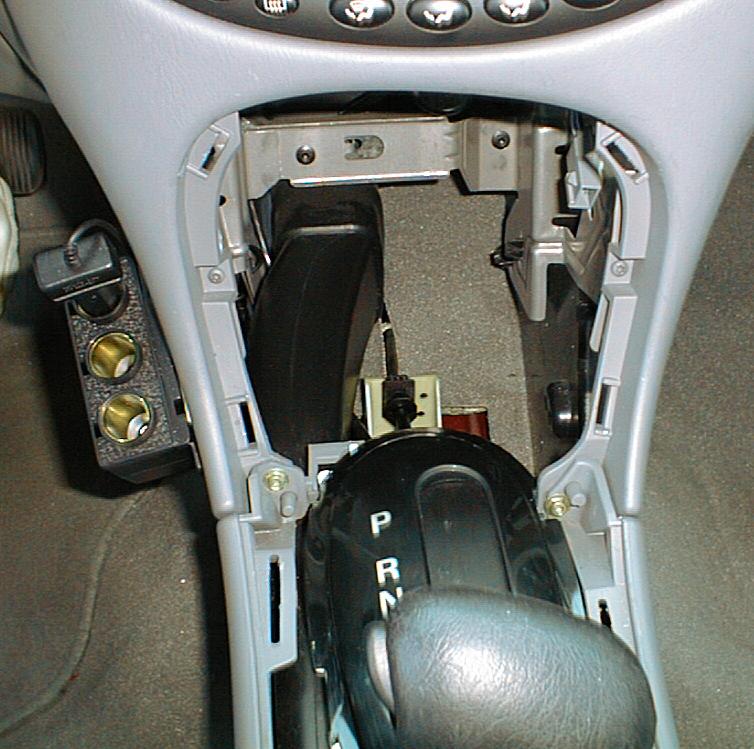
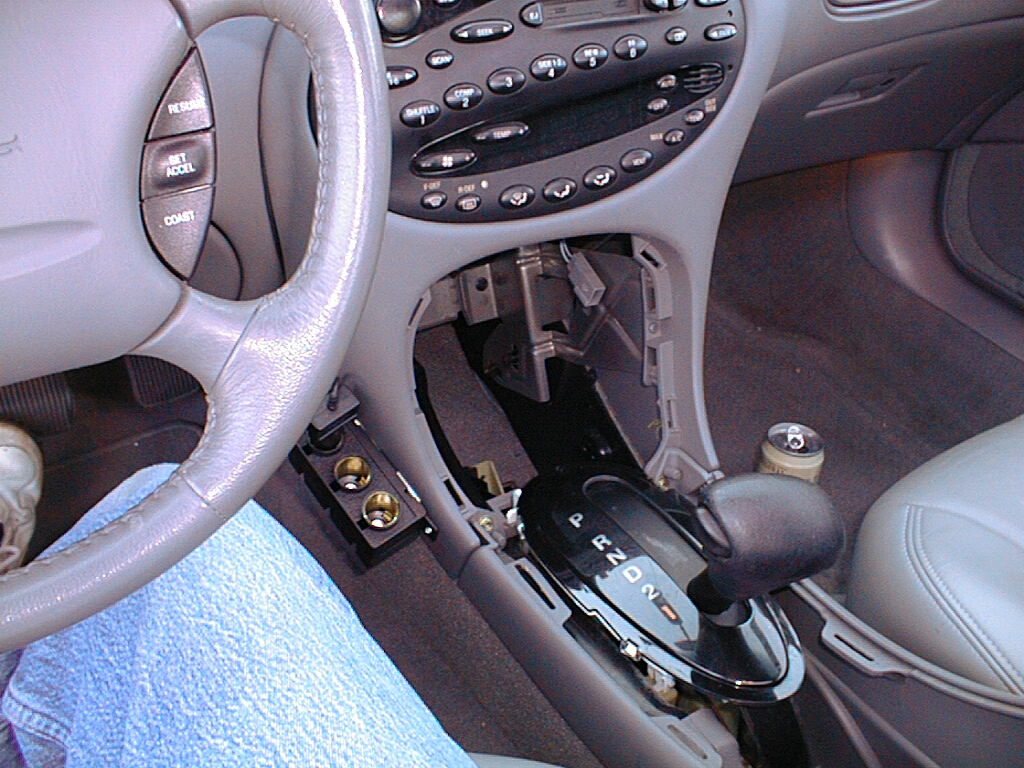
I pulled my cup holders and ashtray today. It was an interesting experience. In case anyone has forgotten, my lighter socket twisted out and caused multiple rattles.
I tried to use the info on the V8 FAQ under external transmission control removal but didn’t have a lot of luck. I ended up breaking a lot of plastic parts. Here’s my story in case anyone else wants to do something similar.
First step was to try to separate the molding on either side of the shifter. Broke the left one, left the right one alone.
Next, using two flat blade screwdrivers, I popped the cup holder assembly straight up in the air, it came right up but broke a support that is under the front of the center console. I was able to recover the broken part and will try to fix it.
Next was pulling the fascia/ashtray assembly out with the shifter pulled down to low. It came out somewhat easily but tore the torx head screws holding the ashtray assembly to the fascia. After looking at this for a while, I don’t see how you can pull this whole thing out without damage.
I could not remove the shift indicator bezel because of the shift knob/Tbar. I can’t find a way to remove it. My bezel is extremely scratched and I would like to replace it. Any ideas?
I’m going to be spending some quality time applying epoxy to the torn out screw mounts for the ashtray/fascia mounting to try to save this part, otherwise a new part will be on order. Also the support on the cup holder left a good break that should take to some epoxy for a solid repair.
Has anyone else done this? I am at a loss as to how the dealer can remove this assembly properly.
The good part of this deal (if we can figure out how to do this without damage) is there is plenty of room on the backside of the cup holders to mount some low-profile switches for such things like SARC control or fog lamps. There’s plenty of room below on the passenger side about hip level. On the driver’s side there is the duct for the rear seats that interferes with any depth. Also there is plenty of space to put switches around where you right knee would like to rest, although you may need to cut some metal for some switches.
Pictures available upon request, my center console will be gutted like this for probably a week while I decide to either fix or replace.
Thanks to Glenn Murdock for help and guidance in this endeavor. He didn’t break my parts, I did, but he helped me figure out this jigsaw puzzle.
David
’98 Center console gutted
Ok here's the meat and potatoes. Sorry if the image quality is a little dodgy. I also don't have any serious image editing software on this computer so I'll have to let the written word help out.
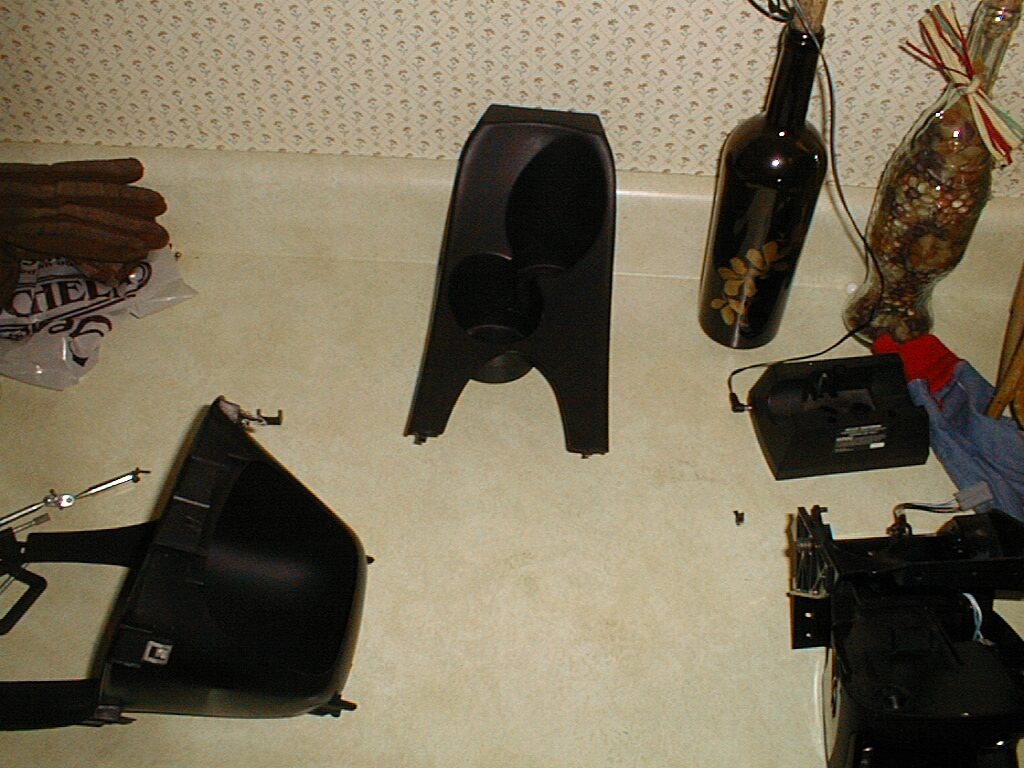
Image 01 shows the bottom side of the both the external assemblies. If you look at the top of the cupholder you should see a light C shaped area. That's where the small bracket that's on the counter in front of it was attached. Also notice the tabs (left one broken) at the bottom of the cupholder and the holes at the top of the ashtray fascia. Note the actual ashtray assembly is not in this picture. You can also see the compression clips around the perimeter.
Image 02 shows the ashtray assembly placed on the ashtray fascia. The fascia is laying face down. At the upper right you can see the backside of the lighter socket. These two assemblies are attached by 3 torx head screws. You can see two of them right in the middle, there are also two aligning pins right beside them. The other attachment point is hidden on the right below the ashtray. All three of these broke out (rather easily) as I pulled this out. What's odd is that the ashtray assembly is smaller than the fascia so pulling it out shouldn't have done this. The electrical connector didn't do it.
Image 03 is pretty self explanatory. The third torx screw mount is at the top middle between the two assemblies.
Image 04 shows this after 'pivoting' the ashtray assembly from the bottom and laying it down.
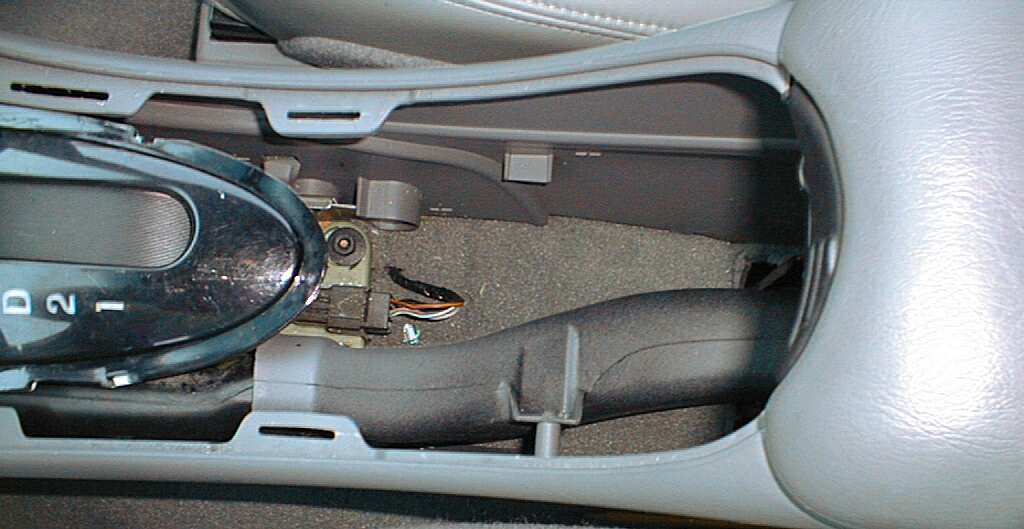
Image 05 shows the cup holders at a different angle, you'll notice the broken tab on one side. When I originally posted I said that there's room for some switches on the passenger side at hip level. Look at Image 01 from my previous post and then this picture, the space to the left of the upper cup holder (in the picture) is completely free. On the lower cup holder the area to the right (in the picture) is taken up by the duct for the rear seats.
I failed to mention in my first message that the area above and around where my triple outlet adapter has plenty of room there, as well as on the passenger side for switches and various mounting options. No electrical lines, but some structural sheet metal the further back in the car (towards the driver). That could be drilled or cut out with a Dremel without too much trouble. On my '98 there is a 'door' in the carpeted area below this part of the console. If you haven't discovered this yet try pulling out from the firewall side of the panel, there is a hinge on mine. Also do the '97's have those funky cup holders? I haven't seen them in person but they could be structurally different underneath than the simple design of my car.
While I've got this stuff out I'm going to pre-install a miniature momentary switch for future fog lights/driving lights. And I'm going do a SARC switch with a similar design, however instead of using a big switch/big wire in the car I'm going to use a relay in the engine compartment with a latching switch circuit that will default back to factory when you turn it off. My triple outlet should keep my knee from hitting the switches while carving through the back roads of Missouri.
I may decide to replace all the parts instead of trying to fix what I've got. I haven't talked to Ford yet, but I do have a friend who owns and automobile recycling business (i.e. junkyard) and if I can ever figure out how to take this stuff out right, I'll be in business for free other than the time and effort.
I hope this wasn't a waste of bandwidth. Let me know if you have any ideas.
David Mechanically challenged but electrically creative.
 |
 |
 |
 |
 |
| Image 01 - 94k | Image 02 - 403k | image 03 - 603k | Image 04 - 77k | Image 05- 342k |