| Gary's words of wisdom... |
click on any photo to see a larger version |
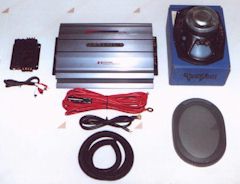
Lets start out with the components which were used in this example of an SHO subwoofer upgrade..
The photo shows the power amp, an active crossover to offer a more flexible tuning of the low frequencies then what is included with the
amp. A 6x9" subwoofer designed for `free air' operation. A selected grill which has been `dyed' to match the gray interior of the SHO (thanks to Mike Holhut for the dye job) and various power and audio cables with inline fuse and black tubing for giving the cables that `factory' look...
|
 |
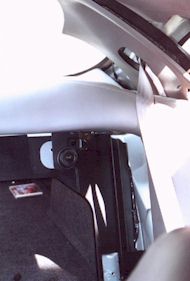
| In this photo, I popped the rear window moldings, which
can be a bit of trouble with the seat belt threading through them as
well as the metal and PLASTIC snap clips! In the center of the picture,
you can see that
I also removed the bolts, which hold the seat back, this HAS to be
removed in order to lift the rear deck carpet. It is also a good idea to
remove the seat back assembly completely to avoid damage to the leather,
same for the lower seat cushion.
|
 |
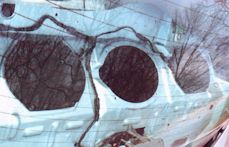
This image shows the exposed rear deck and the speaker arrangement begging for the 6x9" to be installed!
|
 |
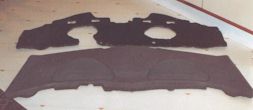
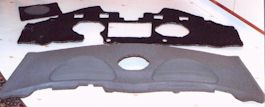
Here is a shot of the removed rear deck carpet insert AND the sound
deadening pad also.
|
 |
| In this photo, you can see an opening in the center of the rear carpet insert and pad and are ready for the grill to be installed. You can see the left over material in the upper left.
|
 |
| The grill is now installed ! |
 |
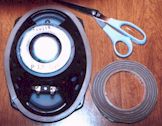
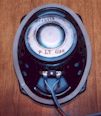
These photos show the foam strip being applied to insulate the speaker frame from sitting directly against the rear deck cutout and also helping to make a better seal, and eliminate sympathetic vibration.
Also the use of lugs for the actual connections.
|
 |
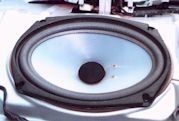
Here are a couple of photos showing the 6x9" subwoofer in its new home. Note in the close up, the foam around the backside of the driver is nicely compressed.
|

 |
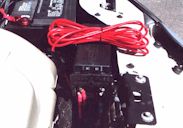
| In this image, you can see I went to the main (+) feed to the power fuse box.. Slide up the little door covering the connectors, you'll note, one cable feeds the alternator, the other comes from the battery. Attach your cable there. I later covered up the red cable with the black wire covering which matches very nicely the factory harnesses. I also found that conncecting the power in this fashion keeps the top of the battery `uncluttered' with the extra cabling. |
 |
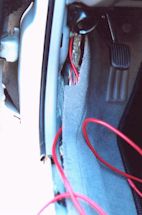
| This picture shows the power cable beginning its trek (behind the kick panel and under the carpet sill) to the rear of the SHO. I found a nice large factory hole with a rubber grommet in the firewall just above the power brake booster tank. Running the 8 gauge cable through this and inserting the grommet back into the hole keeps the noise and moisture from the SHO interior... |
 |
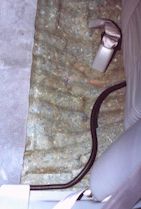
| This image shows how I routed the cable under the rear seat cushion area and is enclosed with the black cable covering. |
 |
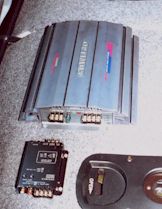
| In this photo, the amp and crossover have been mounted to the RIGHT fold down seat back.. I used stainless self tapping hardware, as there seems to be a sheet of very hard plastic lining the back of these seat backs under that gray carpet ! |
 |
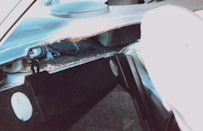
| Pictured here is the rear deck insert going back into place. For the main ground cable to the amp, I sandwiched the lug between on of the lower bolts which hold the rear seat assembly. Be sure to scratch away some of the black coating to expose clean metal for a good connection.. |
 |
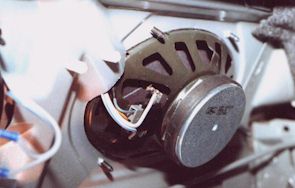
For the `high' level input to the crossover, I used BOTH left and right channels of the Premium Sound rear speaker lugs for my source of audio signal... In this photo, you can see the ample lug on the right 5x7" driver in which I soldered my connection.. The LIGHTER marked cable in the Ford speaker wire is the POSITIVE feed. Shown here in YELLOW...
If you get the phasing incorrect, there will be a cancellation of the bass in the system.
NOTE: Not shown in my photos is the connection made for the REMOTE `power on' feed usually a blue wire of small gauge. You can connect this to the source which runs the power antenna drive motor.
|
 |
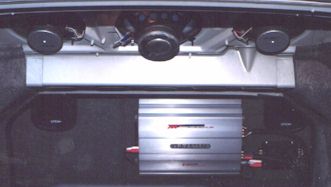
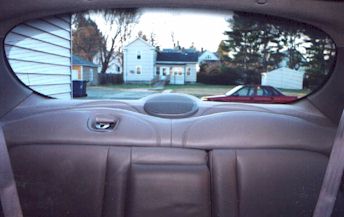
| The finished subwoofer installation! Most cables at the amplifier are covered to keep a neat and professional appearance. Note also that my speaker cables are all hidden `on top' of the rear deck and follow the factory harness routings. |
 |
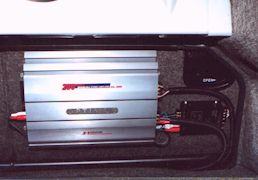
| Depicted here is a detailed image of the amplifier and crossover harnesses. Gray carpet material which matches the seat back could be used as a finishing touch to further conceal the interconnects between the amp and x-over. |
 |
This photo gives you a good idea on how nicely the matching subwoofer grill integrates with the interior of the SHO. Ovals fit very nicely don't you think?
How does it sound? I set the Ford Mach bass setting to the middle position, and tuned the subwoofer crossover to 50Hz. Amp and x-over outputs are set to the half way position which delivers a nice balance with this system.
The 6x9" driver uses the trunk cavity as a `free air' bass cabinet. It doesn't slam you, but gives a nice bass extension with a bit of authority, but is not overpowering.
Gary Smith |
 |
